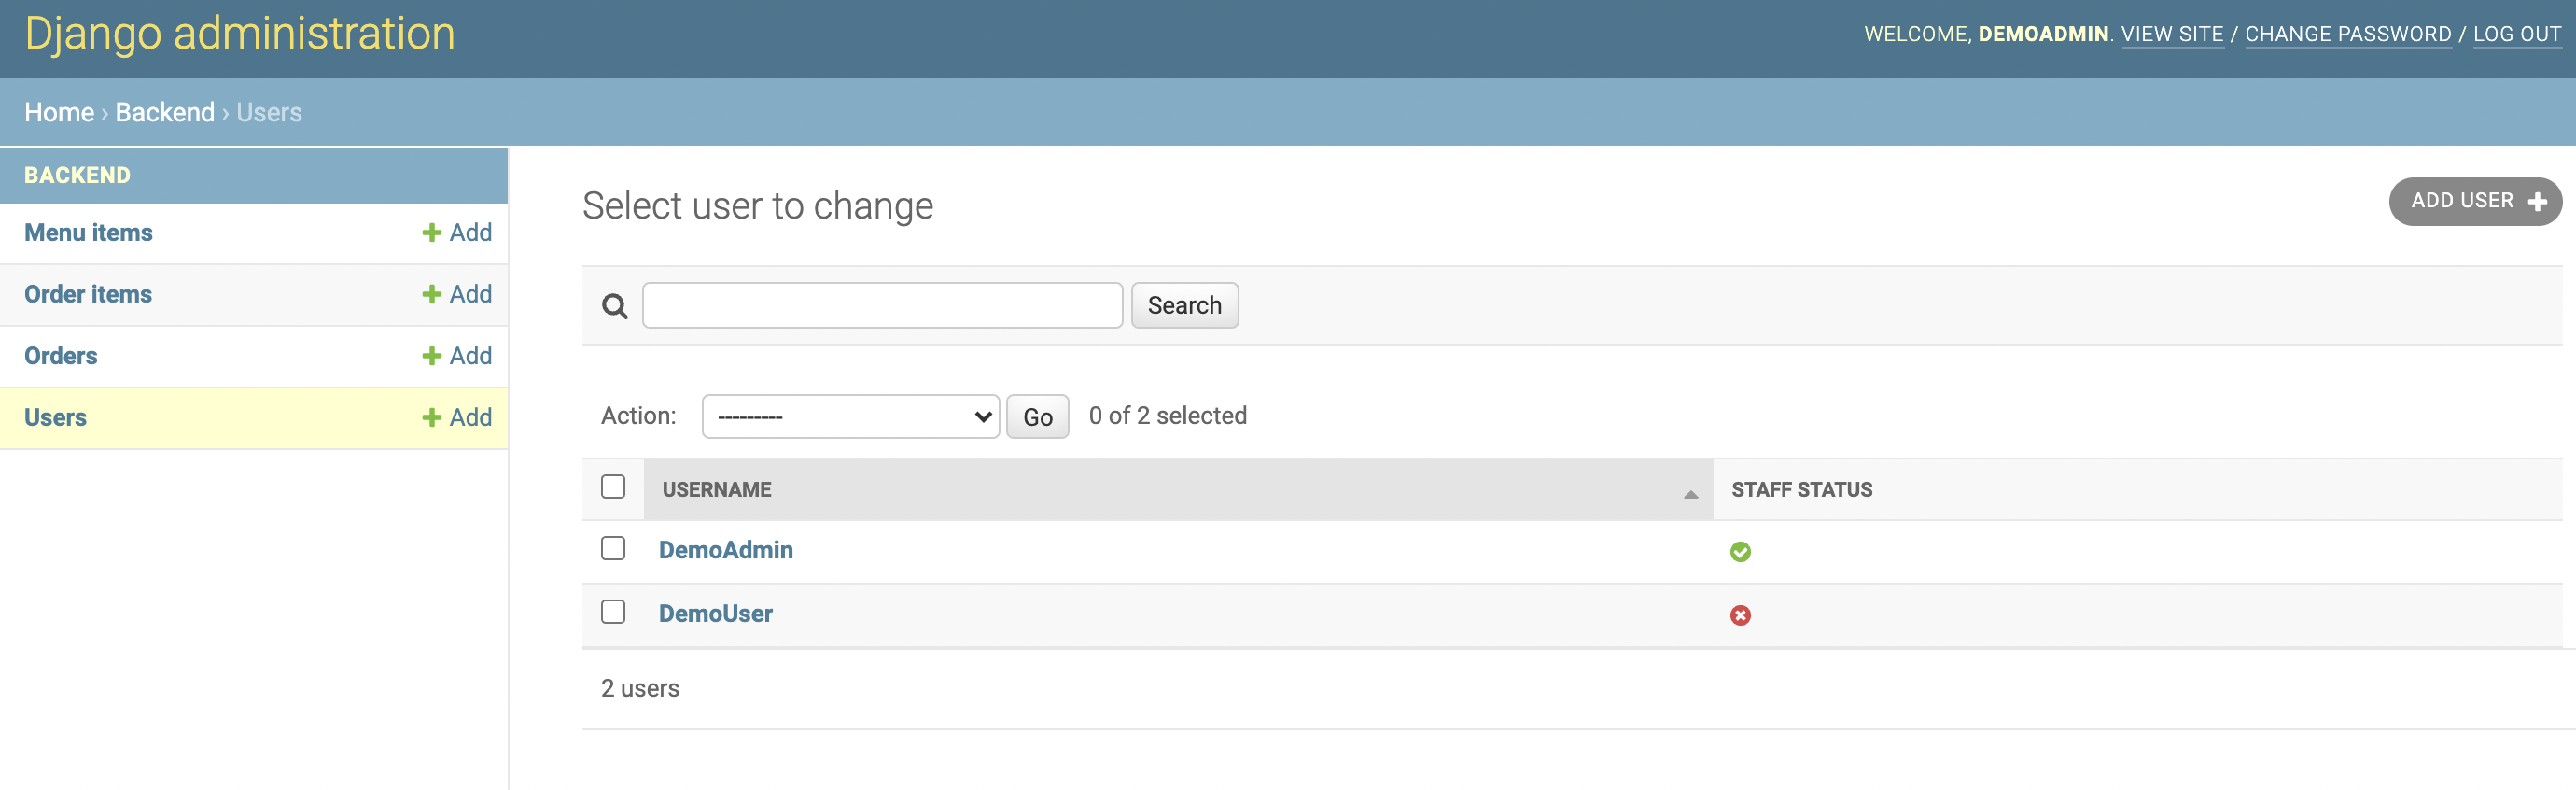
The users table within the OrdSys admin panel provides an overview of all user accounts associated with your organization. To access this table, log in to the admin panel and select the Users table. You’ll be presented with a list of users, and you can identify accounts with admin privileges by the green checkbox under their staff status—indicating the ability to log into the admin interface.
Creating a User #
For organization admins, creating individual user accounts is beneficial for operational efficiency and detailed statistics, especially if managing more than one bar or service point.
To add a new user, click the “Add user” button at the top right of the users table. You’ll be directed to a creation screen where you must enter a unique username and password for the new account.
User Permissions #
As an organization admin, you can create three types of accounts: normal users, managers, or admins.
The Different User Types:
- Normal Users: Have access only to the front-end and are designed for regular staff use.
- Manager Accounts: Intended for kitchen and bar managers to adjust available menu items. These accounts do not have access to financial or sensitive organization data.
- Admin Accounts: Have the most extensive permissions and are meant for individuals responsible for managing users and critical aspects of the organization. Typically, only one admin account is necessary per organization.
To set up a normal account, simply input the username and password and proceed to create the account.
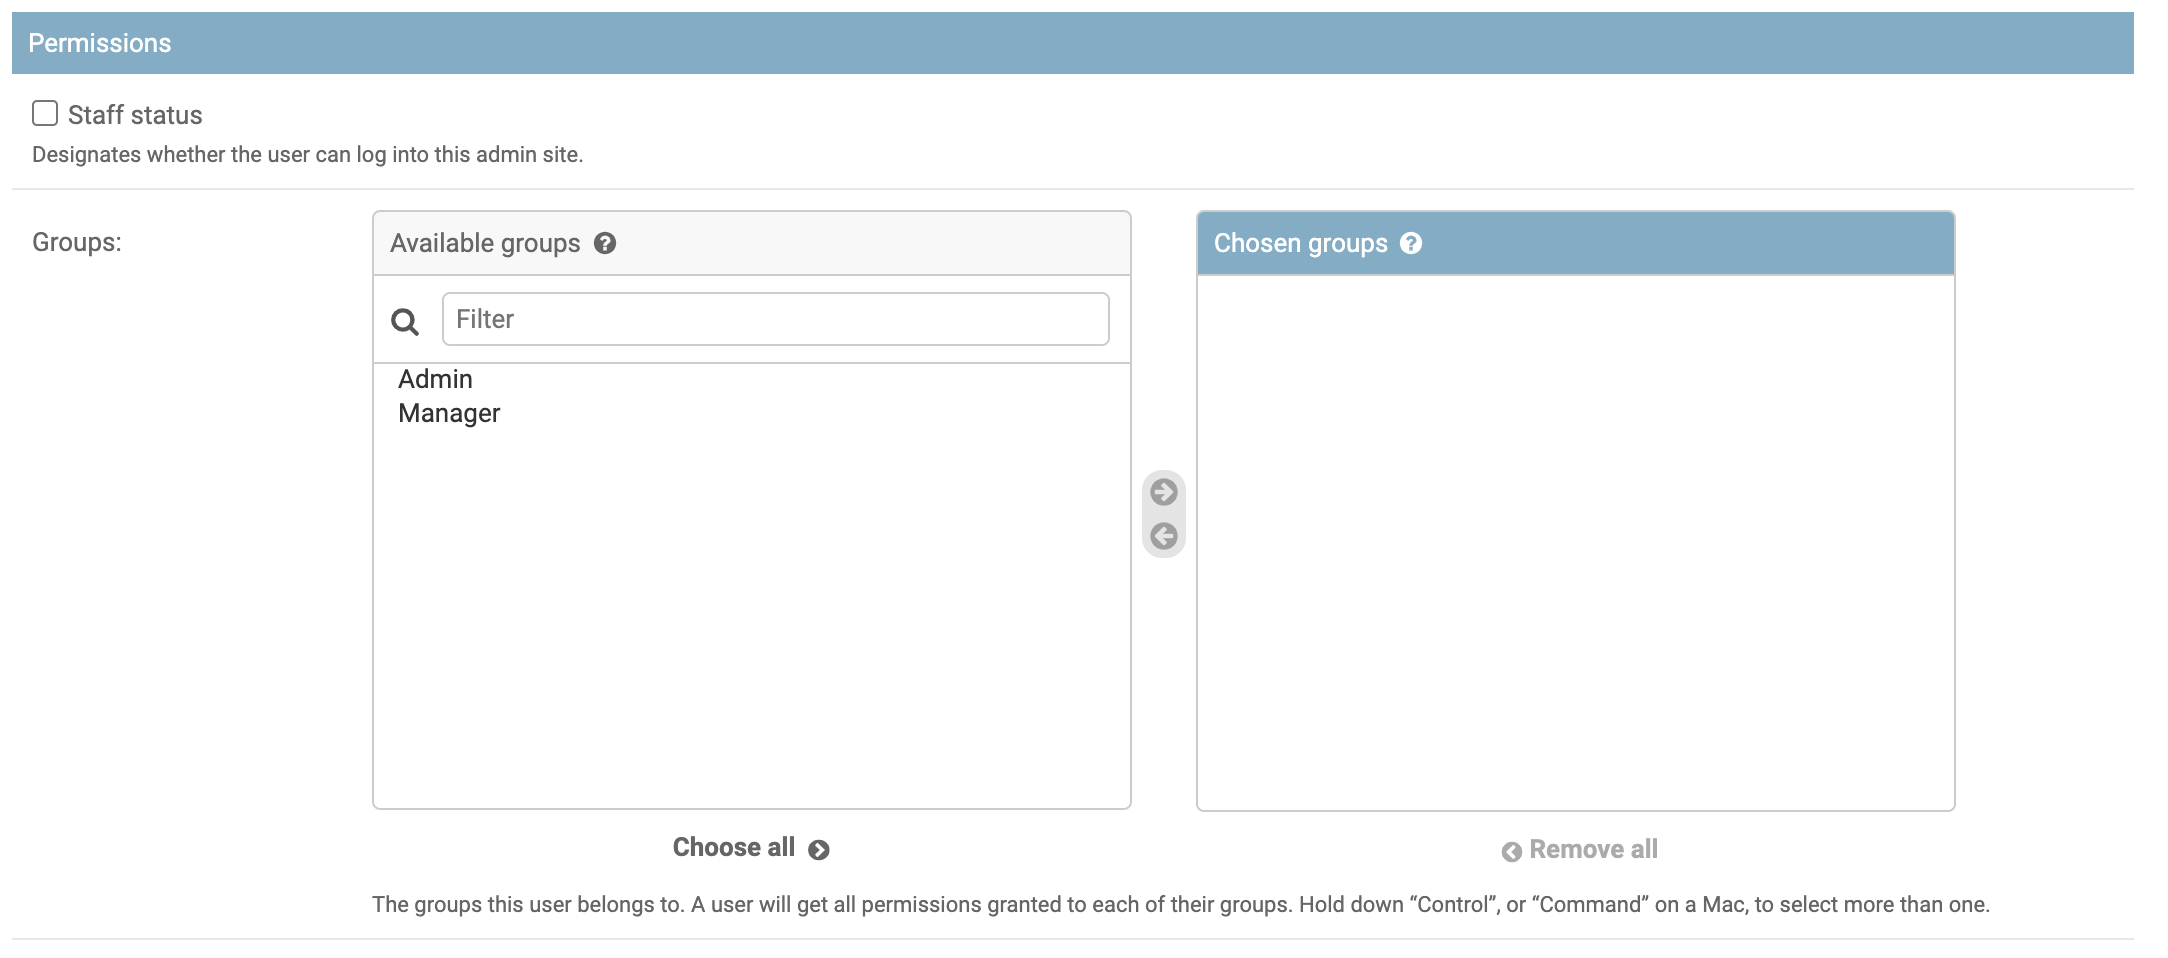
For manager or admin accounts, make sure to mark the “Staff” checkbox to grant admin panel access. Then, assign the appropriate user group by moving it to the right box, which provides the necessary permissions for that account type.
Existing users can also be edited in this interface, but modifying an account will require resetting the password.
Example User Setups for an Organization #
Here’s an illustrative setup for an organization like Klubbverket:
- Eventmästare: An admin group staff account for overseeing account management.
- Köksmästare: A manager group staff account for updating the menu for weekly pubs.
- Bar: A standard account used at the bar for order taking.
- Kök: A standard account for the kitchen staff to prepare orders.
- Utebar: A standard account used for outdoor service during events such as the battle of the sections.
This structure allows for clear delineation of responsibilities and efficient management of the organization’s operations within OrdSys.