Images and Documents
All images and documents are stored under the two tabs Images and Documents. Both Images and Documents work the same way and this instruction will show how to add and manage pictures.

When you enter the image window you will see something similar to the picture above. Here you can find all images in the system. You can search by using the search field and you can filter on different collections. Collections are managed in the settings tab.
Adding images
To add an Image click on the button “ADD AN IMAGE”. You will then enter the add image window.

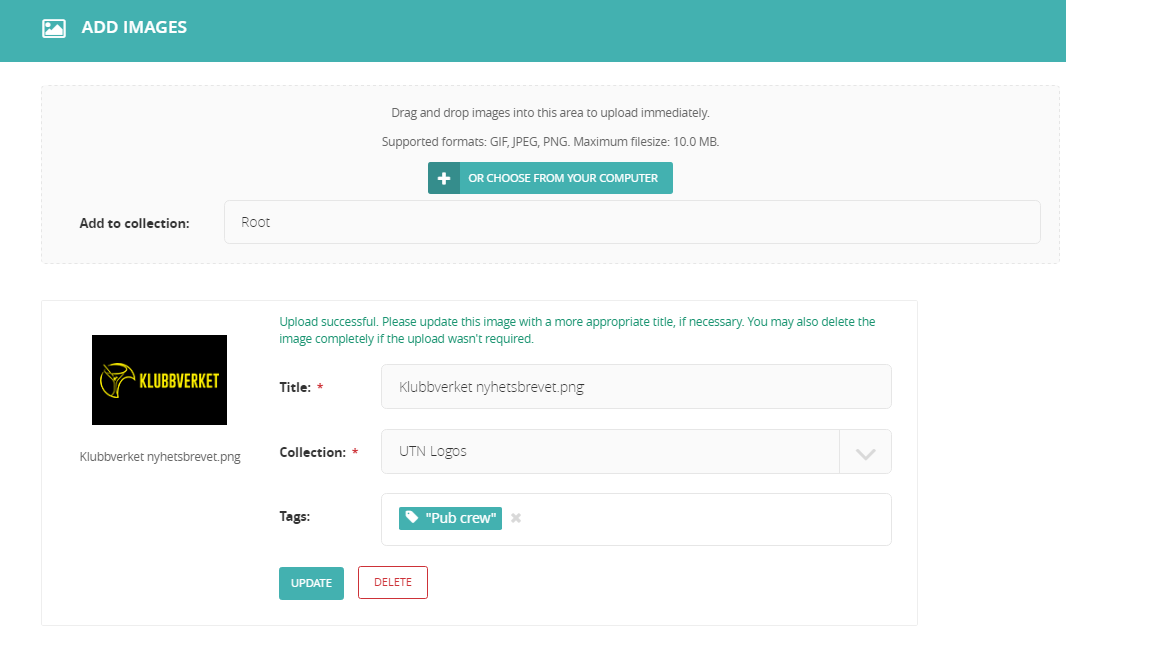
When in the add image window you will see something similar to the picture above. To add an Image from your computer you can either click on the “OR CHOSE FROM YOUR COMPUTER” button or drag and drop a file. When the image is loaded it will appear in the window together with a preview (See picture above). Next to the preview you can change the name of the file, chose what collection it should belong to and add tags. Make sure to give the picture a good name so it will be possible to search for it later. Click save to add the image.
Editing Images
When an image has been added you might want to edit it. Go back to the image window and chose the image you want to edit by clicking on it.

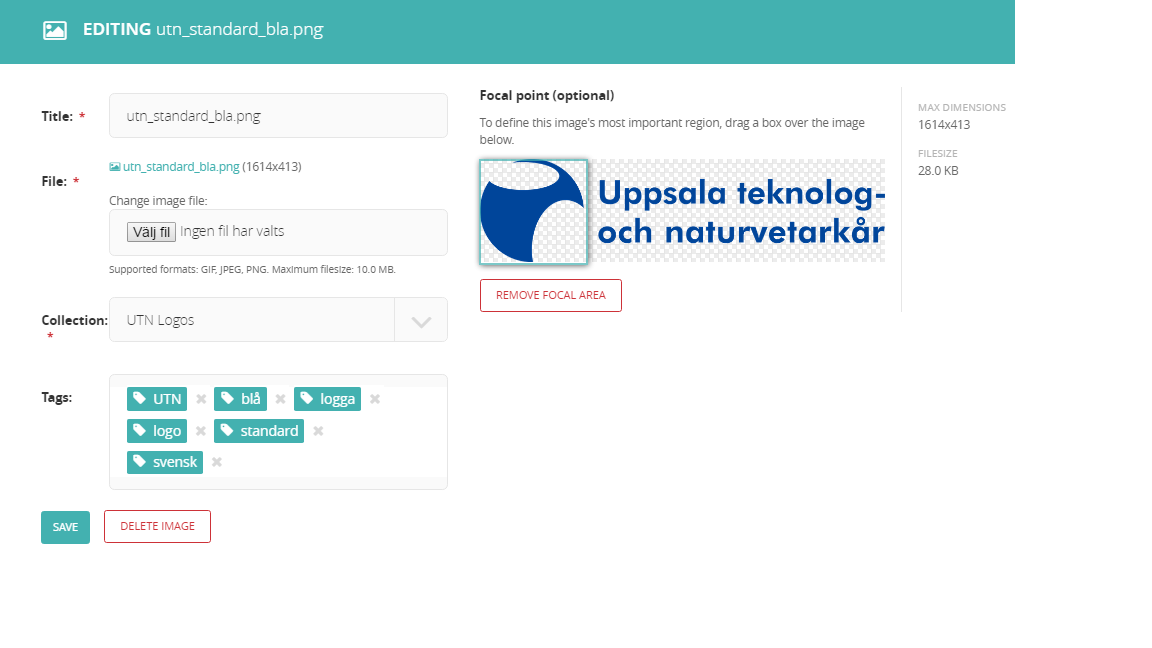
When editing an Image you will see a window similar to the picture above. Here you can:
- See file size and dimensions
- Change title
- Change image file
- Change collection
- Edit/add tags
- Set focal point
- Delete the Image
The focal point decides how the image will be scaled when used in the rest of the system. Set the focal point around the most important parts of the image.
Editing documents
When a document has been added you might want to edit it. Go to the document window and click on the document you wish to edit. (You can not edit content of document)
In the edit document window you can:
- See file size
- Change title
- Change file
- Change collection
- Delete the document
- Edit/add tags