Settings
The menu “Settings” contain the administrative settings for the web page.
Users
The sub menu tab “Users” contains a list of all users on the web page. It is possible to manually add users but preferably the person that wants an account creates it in the log in window.
Add/edit users
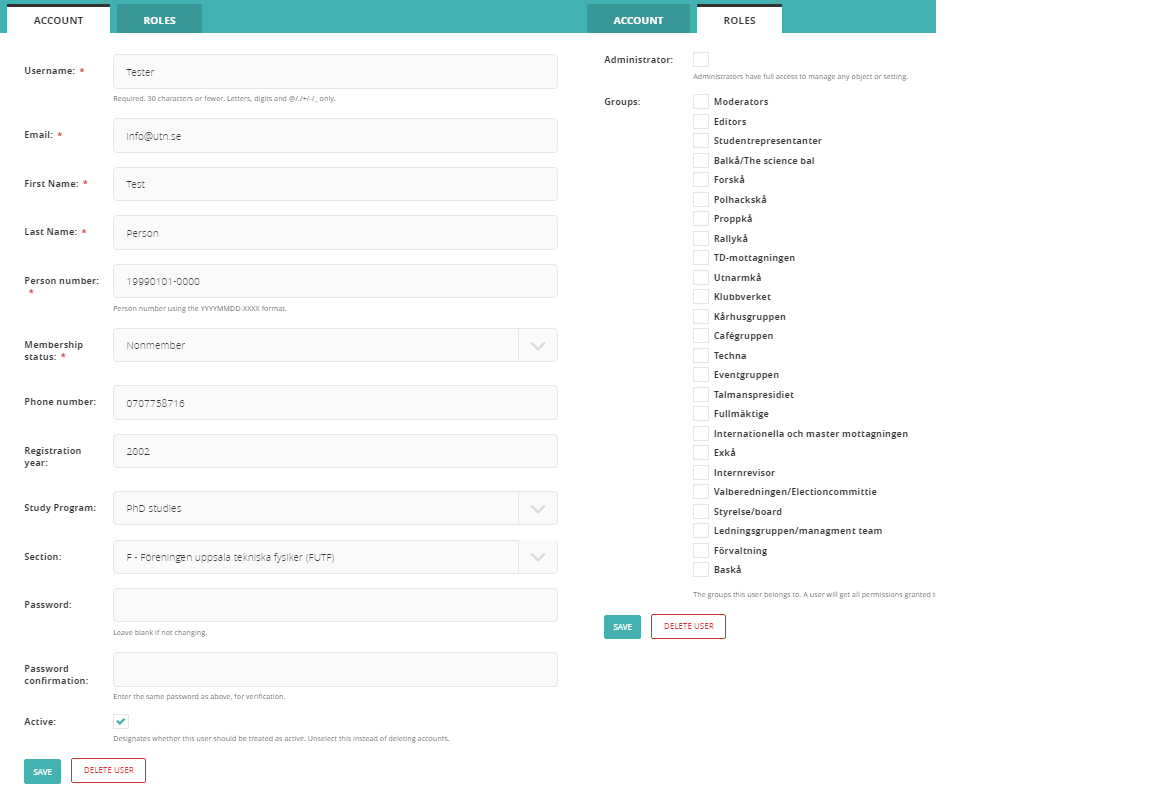
The image below shows an example of adding/editing a user. Fill out all the information and set the status as active. It’s better to set an old user as inactive instead of deleting it. This way contact information to old students is saved. When editing an existing user don’t change the password unless it’s necessary. The member status will update automatically.
The Role tab is used to manually add a user in a group, when a user is added to the group it gets the administrative rights for that group. If the recruitment process is done as it is supposed the user automatically belongs to the group during their term of office. In special cases a user can manually be added to a group, be careful with this function since a manually added user never loses its administrative rights unless removed.
At the top of the roles window is a check bock called “Administrator” if this box is marked the user has full access to all parts of the system. This box must be both manually activated and deactivated. Only persons who must have full access should be administrators, such as the Information officer and System administrator. If the user is administrator it has no effect if the user belongs to a group or not.
Groups
The sub menu groups handles the administrative rights for the officials in a team/committee. These rights both decide what pages you are allowed edit and what parts of the application system the user can use. When you enter the menu you get a list of all existing groups and a button “ADD A GROUP”
Adding/editing groups
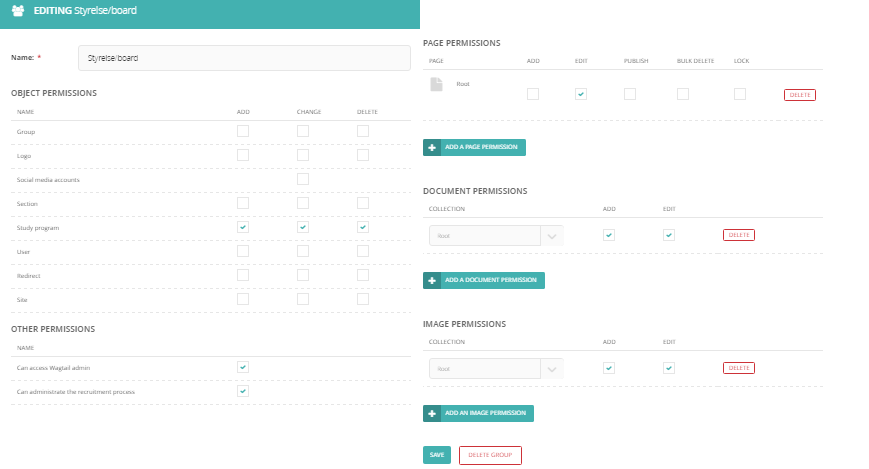
Below is an example picture of how it might look when editing/ adding a group. The window contains the listed alternatives with settings for add, change, delete and specific access:
- Group – Can administrate groups
- Logo – Can administrate logos
- Social media accounts – Can administrate social media
- Section – Can administrate sections
- Study program – Can administrate study programs
- User – Can administrate users
- Redirect – Can administrate redirects Site – Can administrate system websites
- Other permissions
- Admin access – This box must be marked if the users in the group are supposed to access the admin page.
- Administrate recruitment process – Get full access to all parts of the application system
- Page permissions – Here you can ad specific access to different pages, Root gives full access.
- Document permissions – Here you can add specific access to different document collections, Root gives full access.
- Image permissions – Here you can add specific access to different image collections, Root gives full access.
When adding a page permission (any other than root) hold the cursor over the permission and click “CHOOSE ANOTHER PAGE”. A small window appears with a list of all pages on the website. Choose a page by clicking on it. If you don’t know the name of the page, open a new browser tab, navigate to the page you intended and click “show in explorer”. Here you can see the name of the page. For documents and images just choose the collection in the drop down list. To add multiple access to different pages and collection there is an “ADD IMAGE/DOCUMENT/PAGE PERMISSION” for every alternative. Creates a new permission.
Sites
This setting handles the different sites connected to UTN:s page. Here you can see all existing sites and add additional sites. This feature does not create pages on the UTN page it creates new websites. This should only be done by the system administrator or the Information officer.
Collections
Here you can see and add collections for images and documents. Make sure to give proper names to the collections so it is clear if it’s a document or image collection.
Redirects
This setting handles redirects. This means that you can add a redirect from one page of the system to any other page in the system or any URL. When you enter the window you get a list of all active redirects and the alternative to add a new redirect.
When adding or editing a redirect you choose from what page in the system you want to redirect and which site it should be active on. If you want to redirect to a page within the system click “CHOOSE A PAGE” or if it’s to an external link enter the URL in the “Redirect to any URL” box.
Social media accounts
In this setting you can edit the links to the Unions social media accounts. This is most likely never relevant to do. These links appear as social media symbols on the bottom of the page (not admin window).